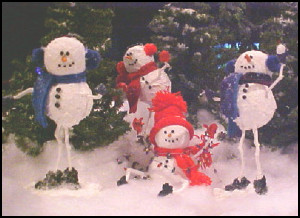
Paper Mache Snowman: Christmas Craft
Project by Karen Gaines
|
|
|
|
|
|
|
|
|
|
|
Materials
Aleene’s Thick & Tacky glue Celluclay instant paper mache orange clay for nose 2 pompoms for earmuffs two 4″ pieces of 16-gauge wire * 4 sticks for arms and legs ** 2-1/2″ and 3″ balls STYROFOAM® Brand Foam acrylic paint: black, white, any color for mittens 1 toothpick long felt or fleece scrap for scarf paint brush scissors
* Wire should be twisted and then hammered flat for the bridge of the ear muffs.
** Sticks should have a bend in the middle for the “elbows” and “knees.”
Directions:
1. Dip a toothpick in glue and insert it into the center of the 3-inch ball. Add glue to the exposed end of the toothpick and place the 2-1/2-inch ball on it, securing the two balls together (figure A).
2. Add the sticks for the arms and legs the same way, by putting glue on the end that you stick in the ball and inserting them into the balls (figure B). Turn the sticks different ways to create different expressions, like standing, sitting, arms up, arms down, etc.
3. Make a carrot nose using polymer clay. Following directions on packaging for use of clay, including drying times and baking, if necessary. Add glue to large end of carrot and insert into head (figure C). Let dry.
4. Prepare paper mache with water as directed on the package. Cover entire snowman body and head (not stick arms or legs) with paper mache mixture (figure D). Be careful not to cover the carrot nose. Form the mittens and feet with small globs of the mixture on the ends of the stick arms and legs.
Add tiny paper mache dots for the eyes, mouth and buttons. Allow paper mache to dry completely, according to directions on package.
Note: If you want to make a standing snowman, create a base out of clay or use a store-bought base. Stand snowman on it and secure with glue. Cover base with paper mache to create “snow” and let dry. 5. Paint all white and let dry. Be careful not to get white paint on the carrot nose. Paint the shoes and mittens as desired. Paint eyes, mouth and buttons black (see again figure E).
6. Paint wire if desired and let dry. Cut one side flat on each of the pompoms. Place wire over head and glue pompoms over ends, flat side next to the head (figure F).
7. Cut a long scrap piece of flannel or felt to the size you want, add fringe by cutting little strips on each end, and tie this “scarf” around the neck (see again figure F).
8. Add any other decoration of your choice, like strands of lights, miniature candies or gifts, etc. HAVE FUN!!!

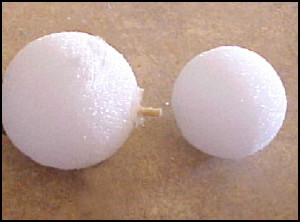 Figure A
 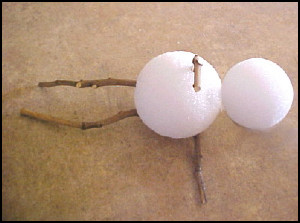 Figure B
 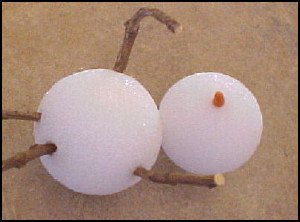 Figure C
 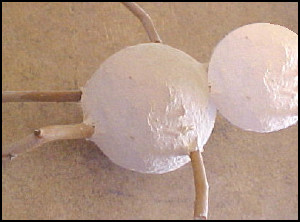 Figure D
 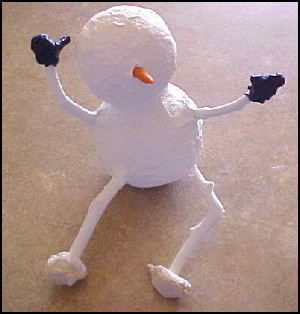 Figure E
 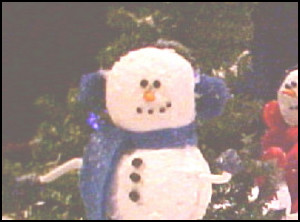 Figure F